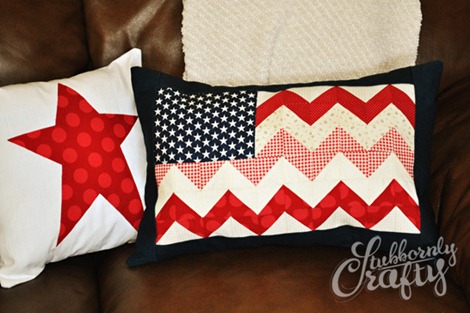
Chevron Flag Pillow Cover Tutorial
Guest Post by Stubbornly Crafty
It’s been a bit since I shared a tutorial with y’all. So here I am to share a quick one on how I made my quilted flag pillow cover.
So let’s get started. I bought seven fat quarters for mine. Three red, three cream, and one blue with stars. All of that provided enough for me, my sister, and my friend Bre to all make a pillow cover with plenty fabric still left over. You can easily make one using one red, one white, and a blue. You’ll also need 3/4 of a yard for the border and backing.
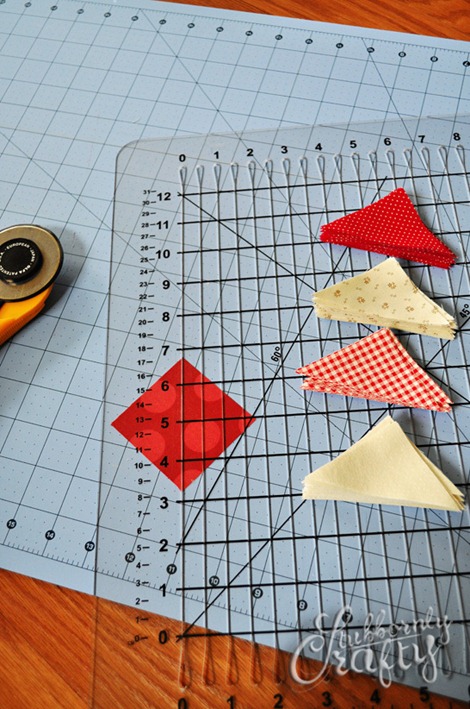
Cut your red and cream (I used cream, but feel free to use white if you prefer) fabric into 2.5-inch squares. You’ll need 24 red squares and 24 cream. Then cut those squares corner-to-corner to make two triangles.
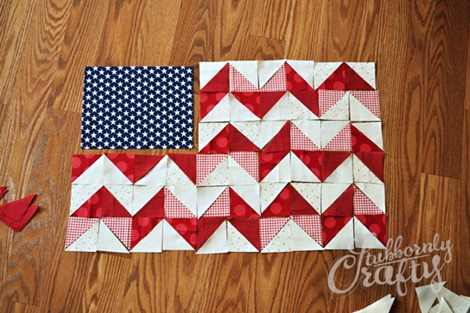
Cut your blue fabric into a 5.5″ x 6.75″ rectangle. Fabulous.
Let’s lay our flag out. Arrange your triangles as shown above, so that every two rows of assembled triangles form one full chevron row pattern. The top row’s pattern is cream-red-red-cream until you have 6 squares (12 triangles total). Then the next row is the opposite of your first row, a red-cream-cream-red pattern.
The size of the entire flag is six squares high by 10 squares wide. The top three rows have your blue star fabric at the beginning followed by six squares across. The bottom three rows are 10 squares across.
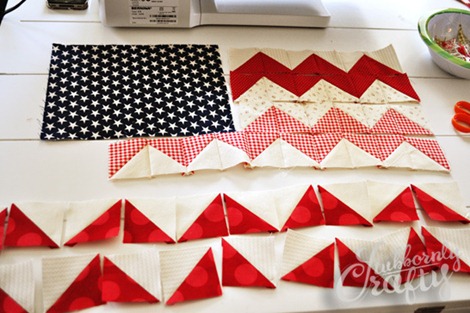
Once you’ve got your pattern all worked out, it’s time to sew. Use a 1/4-inch seam allowance.
First, sew your squares together. Iron them flat and trim the dog ears off. Once all of your squares are sewn and pressed, sew them together into rows. Pin rows together two at a time, matching up seams and sew (I should have a picture of this, sorry). When you have your top three rows finished, sew them to the side of your blue rectangle. As you can see, I cut my blue rectangle too big. If that happens just trim it down to size when you are all finished. No one will know. 🙂
Finish sewing together the bottom three rows and attach to the top three.
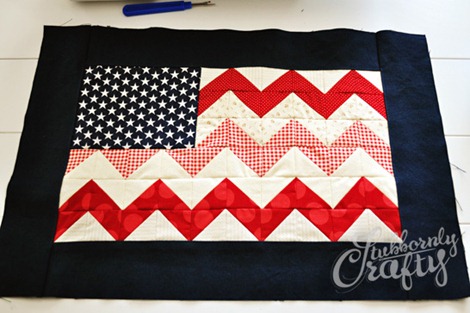
After sewing the flag together, we cut out three-inch blue strips for a border. Our final pillow top size is 21″ x 14.5″ We finished ours off envelope-style. You can watch a video on how to make one of those here. We made our own pillow forms using stuffing, a cheap white sheet, and a serger. Super quick and easy.
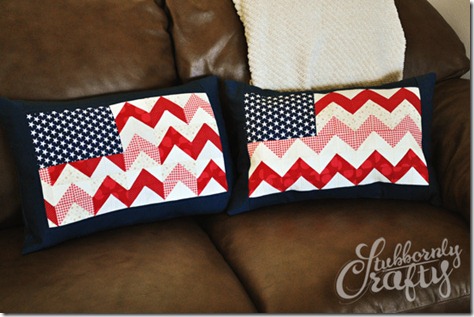
And there you have it. My sister, friend, and I all used different layouts. Here are mine and Bre’s finished pillows.
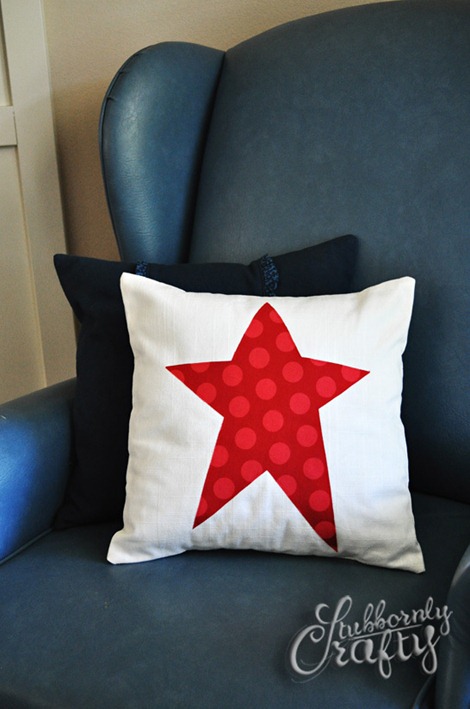
We also made quick applique star pillow covers.
Lisa…thanks so much for sharing your patriotic pillows!
Visit Stubbornly Crafty to read more inspiring posts like this one!
Stubbornly Crafty Etsy shop is full of the cutest baby bibs in the world…trust me and check it out! You can also find beautiful handmade cards at Lisa’s Handmade Cards!
Keep up with the latest from Stubbornly Crafty through these social media sites…

This post is part of our Summer Splash Series of sizzling summer projects and printables! Have you missed any of these creative posts???
- 101 Sewing Tutorials for Summer
- Creamy Orange Soap Bar & Bath Salt Tutorial
- Cheat’s Mango Ice Cream Recipe & Printable
- 101 Handmade Summer Tutorials
- 25 Mod Melt Summer Crafts
Join us each Friday for our Crafty Girl Linky Party! Link up your latest project and meet new crafty friends at the same time. There are so many inspiring ideas in our last Crafty Girl Party…check it out!
Don’t miss any of this Summer Splash fun by subscribing to Everything Etsy in the box below.
Happy Summer!
~Kim
I love this pillow! One day I will attempt it. Thanks for sharing.
I want to make this into a queen size quilt. Any tips to do this? LOVE the simple lines and the brightness. Very Americana
looking good
nice post