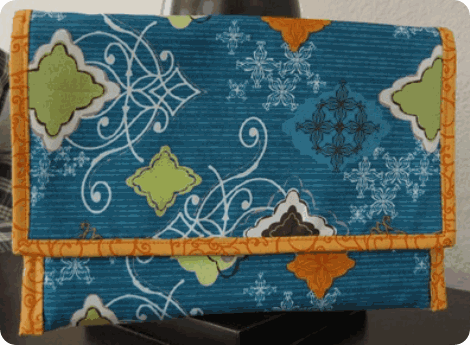
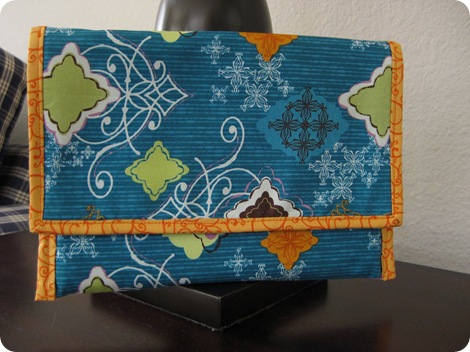
Since I’ve been blogging I’ve found that bloggers are so very generous when it comes to sharing free tutorials, and I feel as though it’s time for me to give back to the blogging community! So here it goes, my very first tutorial…a Fabric Kindle Cover Tutorial!
Materials
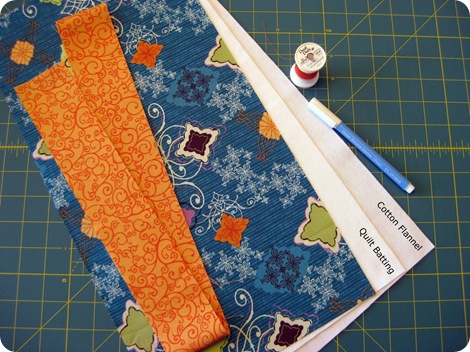
- Outside Fabric: (1) 9” x 17.5″
- Cotton Flannel (Lining): (1) 9” x 17.5”
- Quilt Batting: (1) 9” x 17.5”
- Binding Fabric: 2.25” x 45”
- Thread
- Water Soluble Pen
- Velcro (optional): 2 ½”
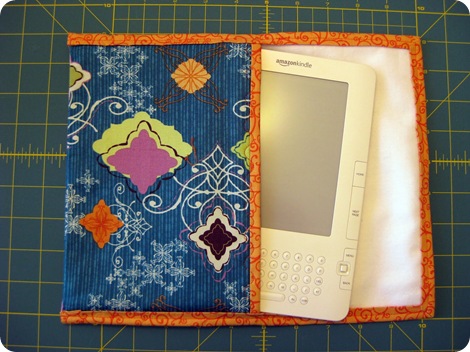
Kindle measurements: 8” x 5.3” (per www.amazon.com)
1. Cut out three rectangles, using a cotton print fabric for the outside fabric (9” x 17.5”), quilt batting for the middle layer (9” x 17.5”), and a solid cotton flannel fabric for the lining (9” x 17.5”), as the flannel will not scratch your Kindle.
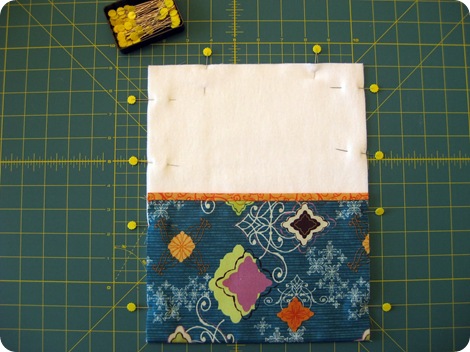
2. Place the outside fabric with the wrong side facing up, quilt batting, and cotton flannel (lining) with right side facing up.
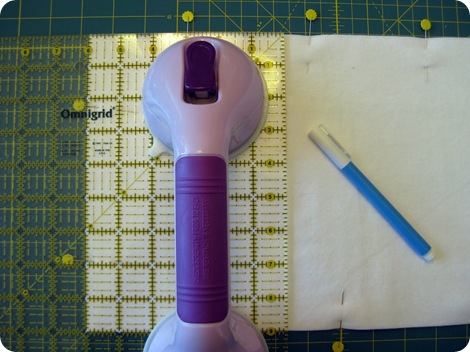
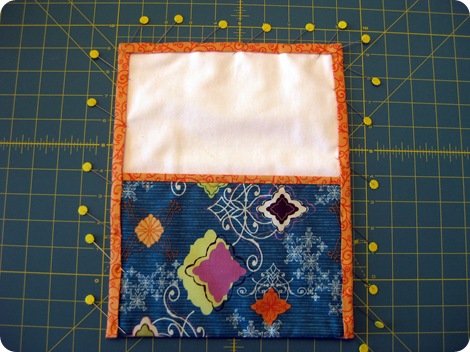
3. With a water soluble pen, draw a horizontal line 6” from the bottom of the outside fabric and stitch on top of the inked line, creating the Kindle pocket. Note- if the outside fabric is too dark to see the water soluble marking (as shown above), draw the horizontal line on the cotton flannel (lining).
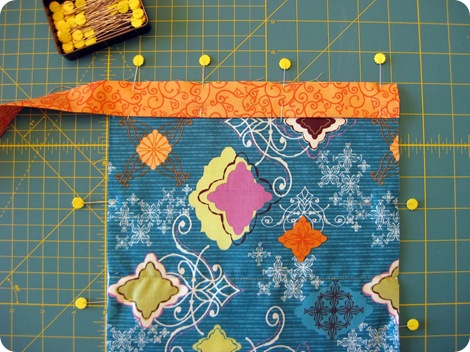
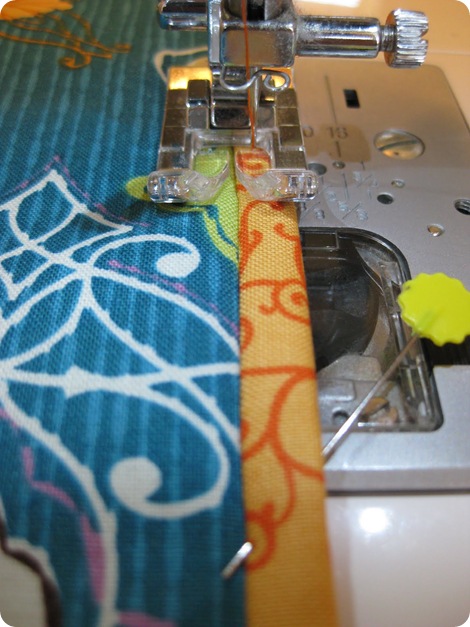
4. Fold and press the binding in half lengthwise. With raw edges matching, sew the binding along the top edge of the pocket with a ¼” seam allowance. Fold over the remaining binding and stitch.
5. Fold the bottom of the Kindle cover at the 6” line, with right side facing up, forming a pocket. Baste around the three exposed sides with a 1/8” seam allowance.
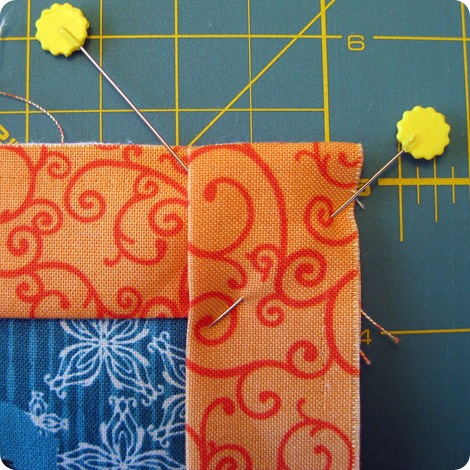
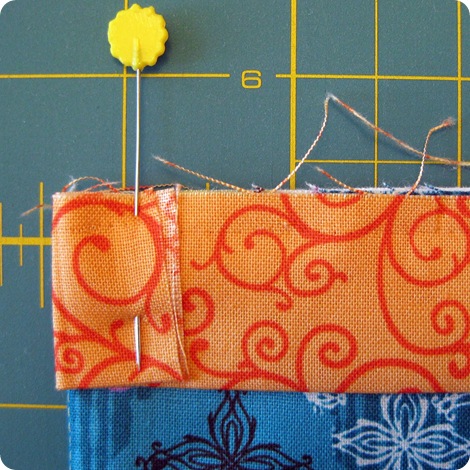
6. Beginning at the bottom left hand corner, fold up the binding ½”, creating a ‘finished’ edge and attach the binding with a ¼” seam allowance to the right side of the outside fabric. When approaching the corners, make sure to stop ¼” from the corner, lift your needle and presser foot and fold the binding up onto itself. Fold the binding down again, aligning the raw edges and resume stitching.
7. Fold over the remaining binding, enclosing the raw edges, and complete with a straight stitch, making sure to neatly miter the corners.
8. As an option, Velcro can be added to insure that the Kindle is secure.Stitch the male side of the Velcro ¾” from the top of the pocket, centered. Repeat with the female side of the Velcro 2 5/8” from the top of the flap.
9. Enjoy!
This tutorial was created by Candice at Made With Love! Thanks so much…you did a beautiful job! I’m sure someone out there received a Kindle this Christmas and needs one of these right now!
***If you would like to submit a tutorial to be featured here, please email me a link or idea. No projects is too small! 🙂
~Kim

Bookmarking this one! My inlaws got each other Kindle’s for Christmas this year…talk about great timing, thanks! :>
.-= Karen´s last blog ..GFCF Christmas Cookies & Apple Tart =-.
Thanks! This is on my list to make! Happy holidays! ♥
.-= Lavender Dreams´s last blog .. Merry Christmas from sunny Florida =-.
very nice tut…many thanks..
.-= kathy´s last blog ..Kid Craft from Zakka Life =-.
*thumbs up*
.-= Casey Marie´s last blog ..1976 Silver Playing Card Case or Keepsake Box Wood Lined =-.
My husband was given a Kindle for christmas and I feel he needs a cover before he takes it traveling. Thanks for the info I will give it my best try to make a masucline cover for my hubby and his Kindle.
I do paper craft tutorials. Be thrilled if you liked any of them enough to feature them
http://angsandy.blogspot.com/search/label/Tutorial
Thanks for the tutorial. I used leftover quilt fabric to make this–my second kindle cover. The first one didn’t turn out well, so I thought I needed a little guidance! Thanks so much for your help!
I love the kinle cover. I’m having one problem and if anyone is on I’d love some help please. i can’t figure out how to start and stop the binding at the bottom so that the ends are enclosed. I sure do hope that someone reads this soon. Dee Dee